This is a quick post. But it is extremely useful. Once I learnt this, I laughed at myself for not noticing it and applying it for God knows how many years … ![]()
Read on to find out how you can use this instantly. Works primarily with PowerPoint… Allows you to mix two images with just a drag action.
I think this is available since Office 2010. But you can try it in earlier versions.
Contents
The need
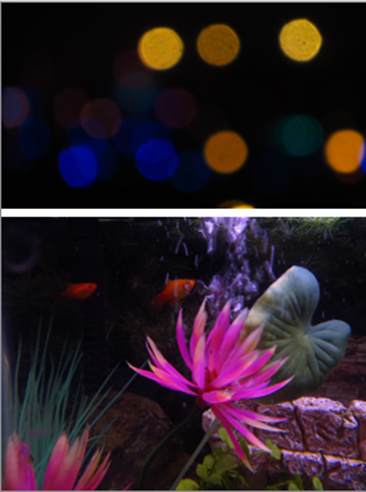
Consider these two pictures below.
Some blurred lights and a fish tank.
Now if I want to mix these pictures. The lights should get integrated with the fish tank. This can be done by making the lights picture partially transparent and superimposing it on top of the fish tank (Bring to front).
Finally I want another picture which shows the mixed picture which I want to use elsewhere.
Solution One
Overlap both pictures. Make the lights – Bring to Front. Apply animation called Transparency… run the presentation – only then the transparency would be visible.
Now capture the combined picture using some screen capture utility and then use it somewhere else.
Solution Two
Take both pictures to some photo editing tool, put them on two separate layers, reduce the top layer transparency – export the resulting image into another one and use it.
The third and simplest solution
This is what I discovered just now. It was right in front of me for years. Just did not notice.
All that you do is align the pictures. Then click on the lights picture. Go to any corner and drag a little…
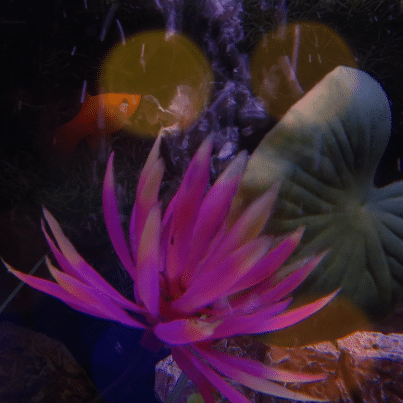
Now, miraculously, the picture becomes transparent and the underlying Fish Tank is seen through it.
Adjust the picture size achieve the desired effect. But DO NOT stop dragging. Now we want to capture the mixed image while it is visible. If you stop dragging, the picture will get resized and obviously become opaque again.
If you did make that mistake already, no problem. Just drag slightly again. Transparency is back.
The drawback of this approach is that you cannot change the level of transparency.
Capturing the composite image
There are many choices here.
Use simple Print Screen button while dragging. Capture the screen and then crop it in paintbrush.
If you have OneNote loaded and running you can press Windows key along with S (Windows S) to capture only the desired area of the screen.
If you have any screen capture tool, use it for a direct capture. SnagIt is the best in this category. But you will find other tools as well for this purpose.
In any case, almost instantly, we got a composite image.
If I had dragged the fish tank image instead of dragging the lights image, the result would be slightly different… this time the fish tank becomes visually more prominent.
Please note that in this case, which image is in front or behind DOES NOT make a difference. Which image is being Dragged makes a difference.
Try it out yourself
You can try it out with any images. If you want to use this sample, download the presentation from the link shown below.
Instant Transparency.pptx (1 mb) Download
P.S: This fish tank is in my friend – Sunil Shinde’s house in Seattle.
It is lovingly nurtured by his daughter Rhea.


2 Responses
I use a different method. My method (Learnt from trial and error). Insert a rectangle shape. Use shape fill –> picture. While picture is inside the rectangle change the transparency to whatever level you want. Now you have transparent picture. Use it on top of other picture. Group both pictures and save the combined picture.
Yes Sir. Your method is also good. In that case, you have to change the rectangle size to fit the picture size. But you get more control over transparency. Great. Thanks.