Often we get photos showing your face or selfies. Usually you cannot use these photos for formal scenarios. Here is a quick way of salvaging informal photos and giving them a professional look.
Contents
The need
Often we get photos which are taken at events, parties, home, while traveling. These photos cannot be used in a formal context. This article shows how an informal photo can be made to look professional in few minutes – just using PowerPoint.
You will need PowerPoint 2010 or above.
Where can you use this knowledge?
The principles shown here can be applied to all kinds of photos.
- Box shots of products
Keep the box and put a more exciting background. - Selfies which have a bad background
Make two copies of the photo. In one, keep only the people. Superimpose it on the original photo. Blur the original. That way the unwanted background is not visible and the persons stand out. - Photos of mechanical components, products, apparel, spare parts
Invariably these have some unwanted background. Remove it and replace it with either a gradient, plain color or some other relevant background. To change the background completely, put another background picture behind the original image and group them together. - Skyline photographs
Remove the boring sky and replace with exciting clouds - Skyline photographs with multiple layers
Skyline has buildings or some natural scene and the sky
Duplicate the picture. Remove the sky in the duplicate picture. Superimpose them. Put text in between them hidden behind the first picture buildings / scene. Animate the text to fly in from bottom and it will appear as though it is coming behind the building. - Duplicate the picture multiple times. Isolate each component separately in each picture copy and modify it separately. Finally superimpose them to create the final image.
Base Photo
This photo has unwanted background, lighting is not proper and it does not look professional. I cannot use this in my resume or a presentation or document. You can download this photo, insert it in a new presentation and follow the steps. Once you learn the concept, try it with your own photos.
Let us refine it step by step…
Remove background
To understand this feature in detail, read the article Artificial Intelligence at work: Remove Background.
Click on the picture – Choose Picture Tools tab on ribbon and click on Remove Background. PowerPoint will analyze the picture and try to determine which parts need to be removed. The pink (magenta) part will be removed. The logic is not perfect. But you can refine it.
Resize the rectangle to include the face and shoulders. Now PowerPoint will reconsider your input and readjust which parts will be removed.
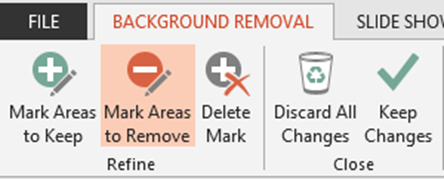
This is still not what we want. We need to provide more input. On the Remove Background toolbar there are more options to indicate to PowerPoint what exactly we want and what we don’t want to keep.
Choose Mark Areas to Remove. Now the cursor becomes a pencil. Of course, you cannot precisely draw the exact boundary of the unwanted area. You don’t need to!
Just draw a line diagonally which covers the area on the left side of the face. Now PowerPoint analyzes the surrounding area and reconfigures the area to be removed.
Do the same action on the right side of the face.
Above the left shoulder, some part of the chair is exposed. Draw another small line there while in the Mark Areas to Remove mode. It may expose some additional area. Don’t worry. Mark that one also. Finally we have what we want. Click Keep Changes button.
The exact steps required to remove background will differ for each photo. But now you got the idea. Use a combination of readjusting the rectangle, Mark areas to Keep and Mark areas to remove in order to get the kind of image you want.
Now the background is transparent. The white color is showing the background color of the slide.
If you paste this photo somewhere else, the local background will show through. We don’t want that to happen.
Add background to the photo
Of course the simplest thing is to add a white background. But while we are at it, might as well as a nice gradient to make the photo look more professional.
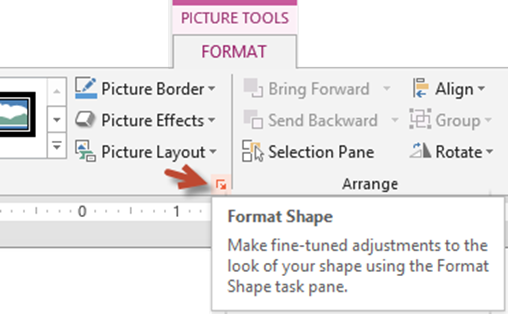
To control the fill, choose the Format Shape button on the Picture Tools ribbon.
Separate pane opens on the right side. Go to the first button to show the fill options and choose Solid Fill – Black color.
Brightness / Contrast
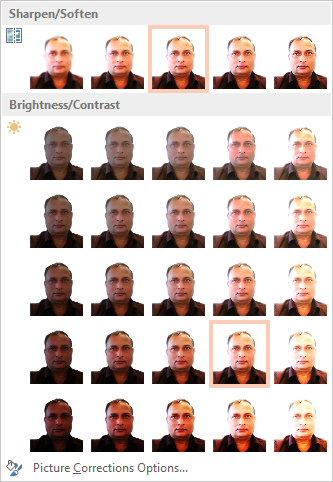
The brightness is a little low. Let us increase it. Choose Corrections from the Picture Tools menu. Various combinations of brightness and contrast will be shown. Move the cursor around to see how the changes appear in the actual photograph. If the Corrections dropdown (it is called a Gallery) overlaps the photo, move the photo to the right and try again. Find a combination which produces best results.
Refine the background
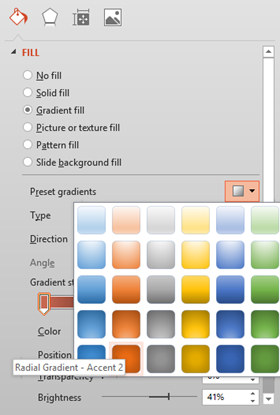
Notice that the light is coming from top right corner. Black background does not look nice. So let us put a gradient. Click on Gradient option. It will apply some default gradient. Don’t worry. Choose the Presets option and choose the one shown. The color does not matter. The radial option matters.
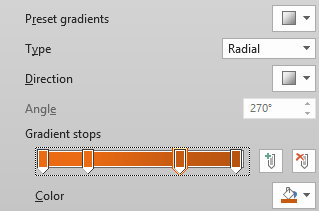
Select the second handle from right and delete it. We need only three stops.
We need to choose a color which matches the shirt color so that it looks professional. If you have Office 2013, choose the color from shirt. If not you can choose the color approximately. If you want a separate color picker – use this free color picker – ColorPic.
Now click on each step handle and choose the same color. Make sure the type is radial.
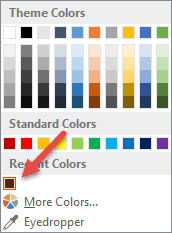
Do not choose the color again and again. Once you select it for the first time, it appears in recent colors section as shown here.
Now choose the color handle on leftmost side and increase the brightness. Now open the Direction dropdown and choose central radial.
Now the effect is still not seen because the lighter part of the radial is in the center which is behind the head.
Select the middle step handle and move it to the right till you get a light halo around the head.
Make changes as required. Now you know all the components required. Customize the changes depending upon the skin color, fabric color and lighting conditions in the photo.
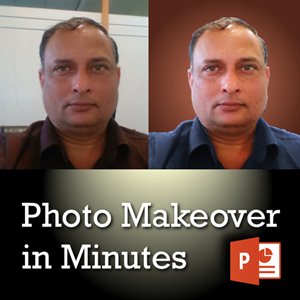
Finally you should get a much more professional looking photo.
Let us look at the before / after images.
Refining individual components of the image
Here is an illustration of the sixth item in the Where to use this knowledge list shown above. Consider the image we have used. The shirt is dark and its pattern cannot be seen. If you change the brightness, it will change the brightness on the face as well and it will not look nice. So create another copy of the picture. Remove the gradient – choose NO Fill. Use Remove Background to keep only the shirt, make it brighter and superimpose. Change the color if required. This is what you get.
Remember, this is not a substitute to professional photo editing applications like Adobe Photoshop. Understanding and refining photos is an art form and experts have spent their entire life perfecting it. Whatever I have shown you is useful if you have no time at hand, and you need quick results where you neither have the professional tools nor the expertise to handle them.










One Response
Reblogged this on Pratik's SharePoint Blog.