In the last post, I had posted a quiz. We already have a winner (Nicholas) and the gift will be sent to him.
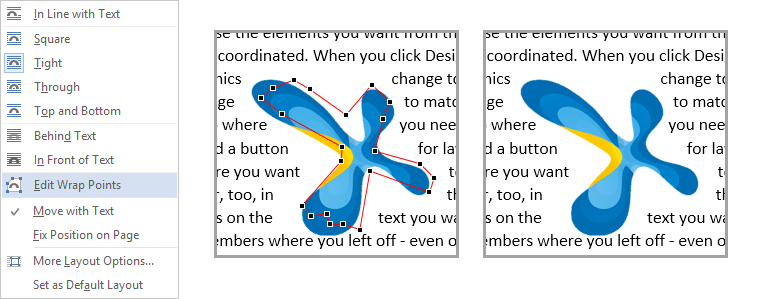
The question was the difference between SQUARE and TIGHT wrap around a picture or object in Word.
If the picture is rectangular – which most pictures are – there is no visual difference.
But if the picture has an irregular shape, TIGHT option wraps around the shape and SQUARE wraps around the rectangle.
Here is the difference…
Things are much simpler if it is an irregular shaped clipart…
Contents
Question: How do you create a picture with irregular borders?
Most pictures have rectangular border. If the picture has a transparency around an object, it has irregular borders. Most standard pictures, captured from cameras or downloaded from Microsoft Clipart are rectangular with NO transparency.
So how do you create transparency to retain what we want?
Here is an example. The original picture in the above logo was like this – with a white background. (I have put a border to illustrate the boundary of the picture)
The white area around the actual logo is unwanted – and therefore, should be transparent. How do we do that?
- Click on the picture (double clicking the pictures opens the menu)
- Choose Picture Tools menu
- Choose Remove background (Office 2010 and above)
- Now PowerPoint attempts to guess what could be the foreground and what should be removed. It indicates the outcome as an altered image as shown below. The pink portions would be removed (make them transparent) and rest would be kept.
- Readjust the inner rectangle to enclose the logo completely within it. Click on Keep Changes Button.
- Now it is a transparent picture. Whatever was shown in pink color has been converted to transparency.
- Now using the TIGHT option wraps text around the irregular shape.


